Click here for instructions on how to install docker-compose for any Linux distribution. On Windows and Mac the docker-compose is bundled with the Docker Engine install.
Save this file in the same folder as your docker-compose file. The name of this file will be dev.env.
Run Docker Commands
Open a Terminal/Command/Powershell window.
Navigate to your project directory.
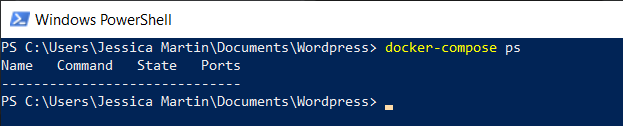
Run docker-compose ps to make sure there are no projects running and should look like the below image.
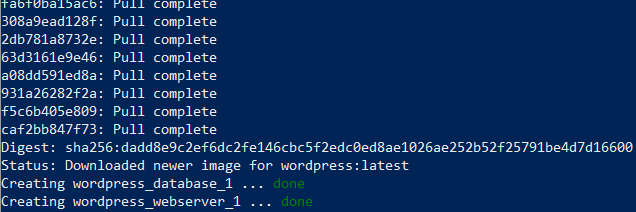
Run docker-compose --env-file=dev.env up --build -d to start the server. This will take around 5-10 minutes depending on the speed of your internet. This video has been sped up so you don’t have to wait.
When done you should see a similar response that says done for both database_1 and webserver_1.
Test Webpage
Run docker-compose ps to check the status of the last command. The status of both lines should be positive.
The line wordpress-lamp_wordpress_1 should have a port that looks similar to 0.0.0.0:8000->80/tcp. The 8000 is very important in the next step.
In your browser url bar type localhost:8000 and press enter. You will get the fist page of the WordPress install.
Select your language and fill out the initial setup form. Make sure you copy the password because it will be used in a moment.
When the setup is complete you will get a login page. Use the email and password from the previous login page.
Congratulations you now have WordPress running on your home computer.
Hello There. I found your blog using msn. This is
an extremely well written article. I’ll make sure to bookmark
it and return to read more of your useful information. Thanks for
the post. I’ll definitely return.
It is remarkable, a useful idea
Хорошая статья
Next time I read a blog, Hopefully it wont fail me as much as this particular one. I mean, Yes, it was my choice to read, however I really believed you would have something helpful to talk about. All I hear is a bunch of whining about something you could fix if you werent too busy searching for attention.
I was surprised about the harsh criticism and was I really whining? Your comment is approved!
When some one searches for his necessary thing, so he/she desires
to be available that in detail, therefore that thing is maintained over here.
Thank you, I have just been looking for info approximately this subject for a long time and yours is the best
I’ve discovered so far. But, what concerning the bottom line?
Are you certain concerning the source?
Itís difficult to find knowledgeable people about this subject, but you sound like you know what youíre talking about! Thanks
I would like to thank you for the efforts youve put in writing this website. Im hoping to check out the same high-grade blog posts from you later on as well. In truth, your creative writing abilities has inspired me to get my very own blog now 😉
Thanks for your blog, nice to read. Do not stop.